First Customer, First Route
Add a customer, save a service location and pool, create a recurring weekly assignment, and confirm the dated visit on Schedule.
First Customer, First Route
Add a customer, save their service location and pool, create a recurring weekly assignment, and confirm the dated visit on Schedule.
Download video · Captions (VTT) · Transcript (TXT)
Before you start, gather:
- A Pool Runs admin login with permission to add customers, properties, and route assignments.
- The customer's name and an authorized service address.
- A technician already added to your team.
- The pool's measured or reliably estimated volume, in the units shown by your account.
Step 1 — Add the Customer
The customer record holds the account's contact information. Its service address and pool will be added underneath.
- Open Customers, then click Add customer.
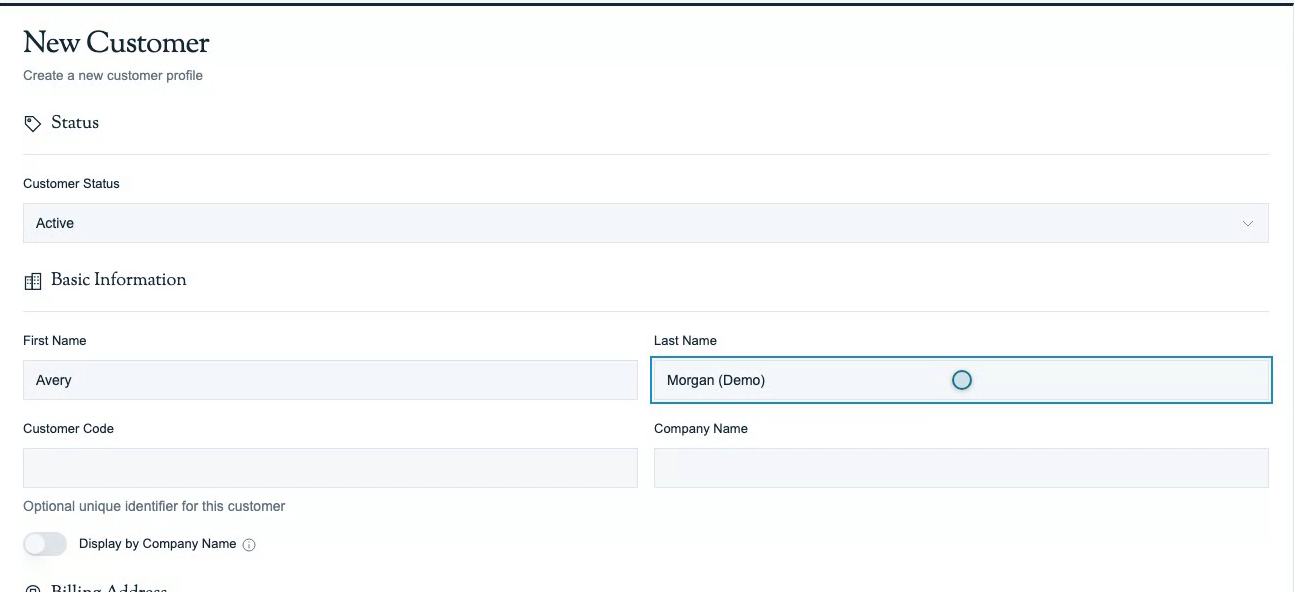
- Enter the customer’s First Name and Last Name. Both are required.
- Add the customer’s Email if available. It is optional when creating the record and supports emailed quotes and invoices.
- Add a number under Phone Numbers if available. The optional phone label identifies who answers, such as the property manager. If you are not adding a number, click the X at the end of its unused row to remove that phone entry before saving. An empty phone row does not validate.
- Keep Customer Status set to Active for a customer ready for service. Prospect is for a potential customer.
- Click Create Customer. Confirm that the new customer's profile opens.
Detailed walkthrough: Add, Edit, or Delete a Customer (Web).
Step 2 — Add the First Service Location and Pool
A property is the location the technician drives to. Each property can contain several water features, with a separate record for each pool or spa.
- In the customer's Service locations section, click Add First Location. An existing customer with a location uses Add location.
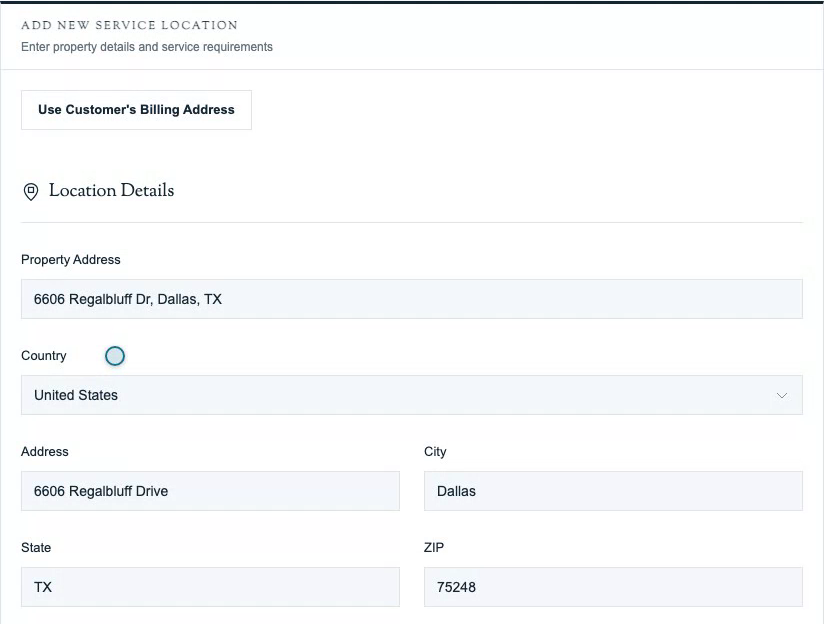
- Search Property Address and select the matching service address. Review the populated address fields. For a US service address, check Address, City, State, and ZIP. Regional field labels vary by country.
- For a US account, Address outside the United States? reveals Country when you need another service country. Select the correct country and review its address and map fields.
- Enter Gate Code when a code is needed. Use Access Notes for instructions the arriving technician needs. Location Notes is optional for other property information.
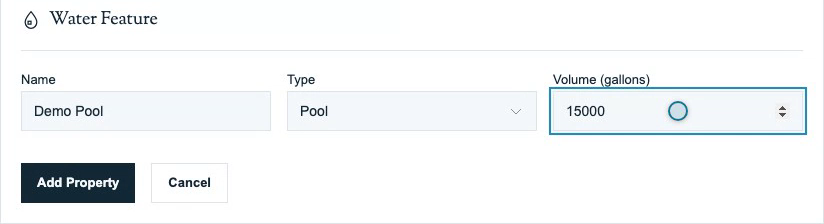
- Under Water Feature, enter a descriptive Name, choose its actual Type, and enter its measured or reliably estimated Volume in the displayed units.
- Click Add Property. Confirm that the service location appears on the customer profile.
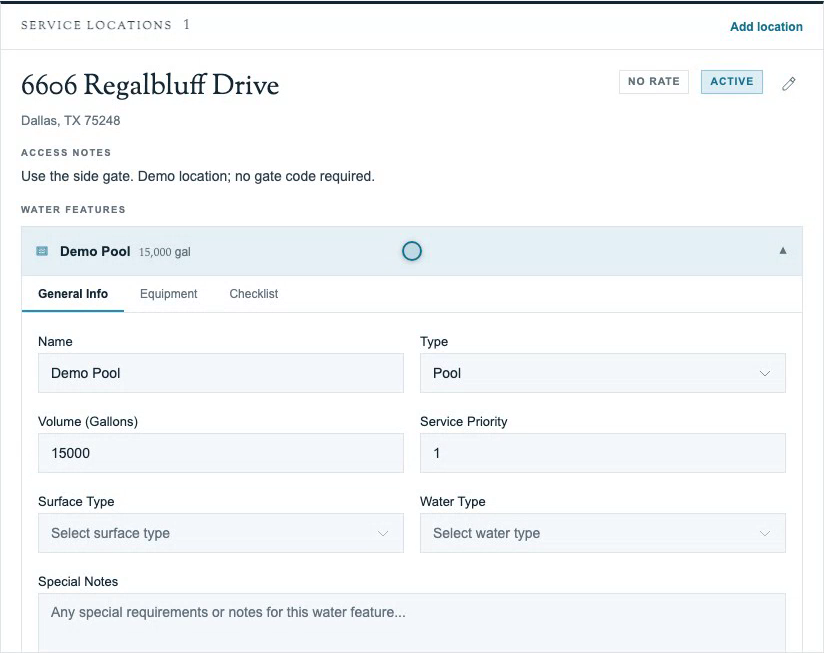
- Expand the saved water feature under that location. In General Info, check the saved name, type, and volume. Confirm that the actual water feature is present before creating its assignment.
In General Info, you can also set Surface Type, Water Type, and Special Notes, then click Save Changes. Review the Equipment and Checklist tabs when ready; checklist setup is separate from surface and water type.
Keep a separate spa as its own water feature with its own volume. Add additional features through Bodies of Water when needed.
For optional location identifiers, estimated service time, pricing, and labor fields, see Properties. Equipment and checklist setup can follow after this first assignment.
Step 3 — Create the Weekly Assignment
A route assignment is the recurring plan connecting the property, technician, service day, frequency, and selected pools or spas.
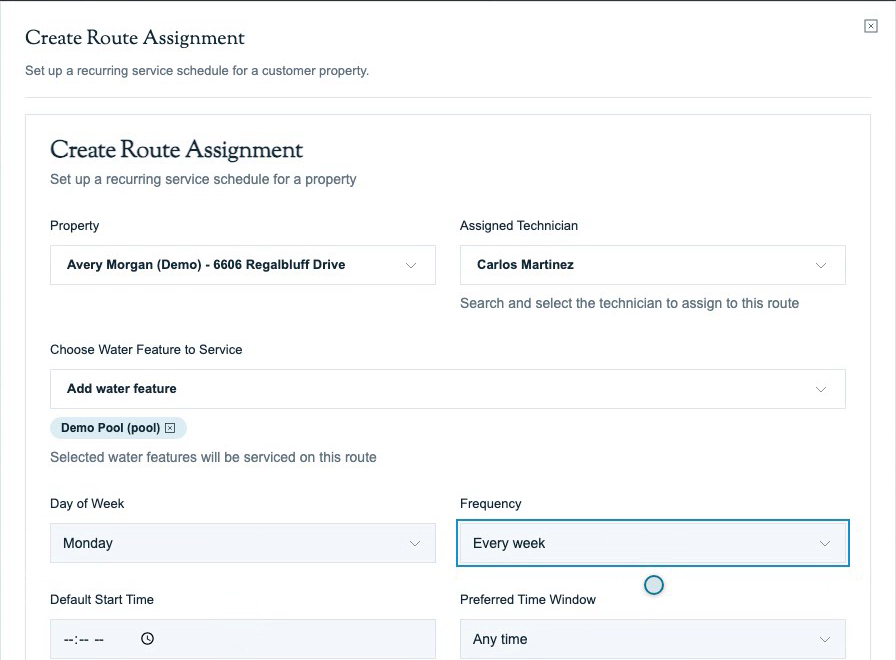
- Open Route Management → Route Assignments. Choose Add Route → Add Single Route.
- Select the Property you just saved. Search by customer name or service address to choose the correct location.
- Select the Assigned Technician responsible for the recurring service.
- Under Choose Water Feature to Service, select the pools or spas included in the assignment. Check that each selected feature appears as a badge.
- Set Day of Week to the agreed service day and Frequency to Every week for weekly service. The other choices are Every 2 weeks, Every 3 weeks, and Every 4 weeks. Every 4 weeks follows a 28-day rhythm rather than a calendar month.
- Review Preferred Time Window. Any time adds no arrival preference. Default Start Time is optional; set it only when a scheduled start time is needed.
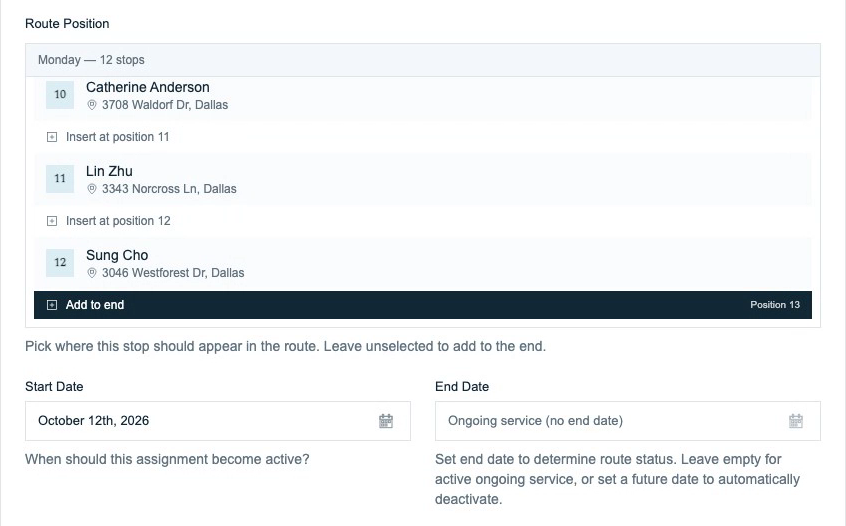
- Under Route Position, choose where the property belongs in the selected technician’s day. Use Add to end when it should follow the existing assignments.
- Set Start Date to the intended beginning of service. Leave End Date empty for ongoing service.
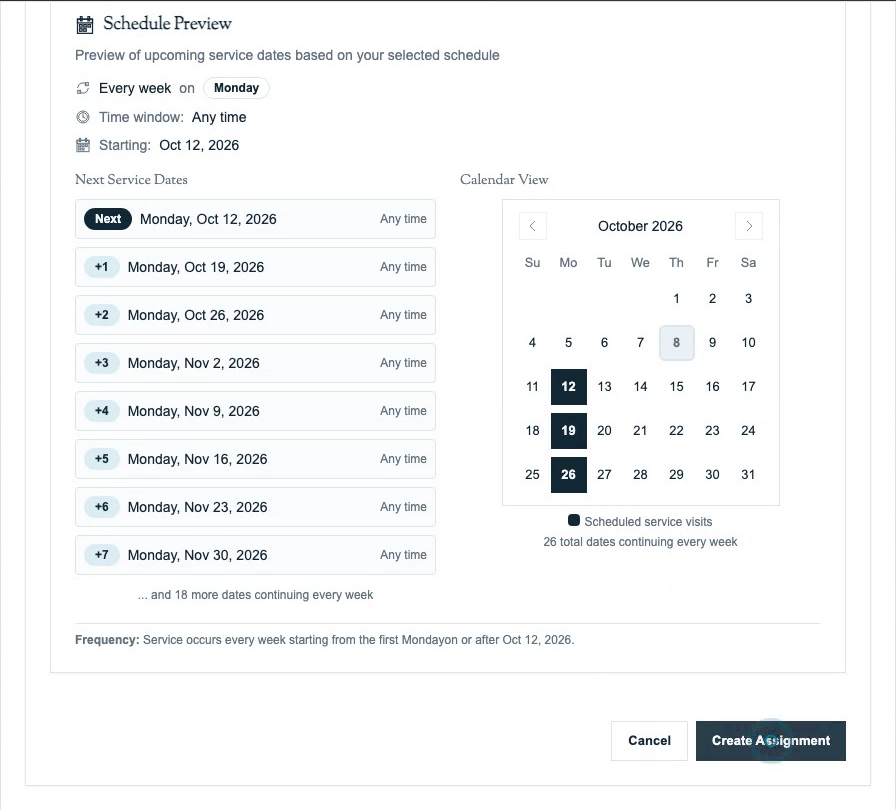
- Review Schedule Preview and confirm the expected service dates. Click Create Assignment, then check the saved property, technician, weekday, frequency, and included pool.
Detailed walkthroughs: Creating a Route and Recurring Schedules.
Step 4 — Confirm the Actual Dated Visit
Check the dated visit as well as the saved recurring assignment. Pool Runs creates route stops within the account's configured generation horizon.
- Open Schedule and select the next intended service date within that horizon.
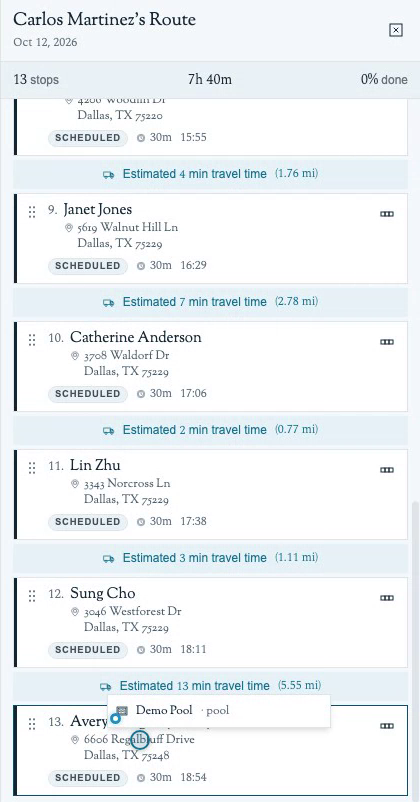
- Open the assigned technician's route for that date.
- Find the customer and confirm the service location.
- Hover the stop's address to inspect its included water features. Confirm that the required pools or spas are included for this visit.
- Reopen the customer profile if needed and confirm that the saved pool still has the correct name, type, and volume.
If the dated visit is missing, check the assigned technician, weekday, frequency, start date, and selected water features. Review Days Ahead, Generation Time, and the generated-through date in Settings → Routes. A date outside that horizon may not have a stop yet. Before using Generate Now, read its permission-dependent description in Settings → Routes. It can add back removed recurring visits. Review a removed-visit confirmation if one appears; when no removed visits need restoring, the action can run immediately without a confirmation. See Route Generation.
How the Records Connect
- Customer — the account’s contact details.
- Property — the service location.
- Water feature — each pool or spa, with its own type and volume.
- Route assignment — the recurring technician, service day, frequency, and selected water features.
- Route stop — the actual dated visit shown on Schedule.
Check both the recurring assignment and the dated visit so the plan and the technician’s next service agree.
Optional Next Steps
- Properties — set service pricing, labor, and other location details when ready.
- Bodies of Water — add surface and water details, additional pools or spas, and equipment.
- Checklists — configure service tasks for the water feature.
- Invoices Overview — prepare billing when ready.
- Importing Customers — add the rest of your customer list from a supported import.
- Managing Routes — edit, move, or end the recurring assignment later.
- Route Builder — review route order and geographic optimization after adding assignments.
- QuickBooks Overview — review the accounting integration if you use QuickBooks Online.